King’s Quest 5: Absence Makes The Heart Grow Yonder
This is the last canon King’s Quest game where you play King Graham (meaning the original Sierra games, not including the remakes, The Odd Gentleman’s reimagination and Phoenix Online’s The Silver Lining)
The premise of this game is an evil wizard named Mordack (hmmm….where have we seen an evil wizard with an M name before? There is a connection, and it’s explained later) has not only shrunken and stolen castle Daventry but also Queen Valanice, Prince Alexander and Princess Rosella were inside! So Graham journeys to the land where Mordack’s castle is and gains help from a good wizard named Crispin to save his family and home.
Note: this is the first original game in the series that is point-and-click.
Again, open the settings and slide all options to the max. Upon the start of the game, you have Crispin’s weakened wan in your inventory, and Crispin’s owl friend, Cedric, will follow you and be your companion.
Walk down two screens and right to the town square (Cedric won’t go into town, any buildings, the forest or the desert, he’ll just stay behind on a tree branch). The town square consists of three shops: Tailor, Toys & Cobbler.
Go up and talk to the man outside the tailor shop. Go all the way right and enter the cobbler shop. Talk to the woman twice and leave the shop. Go back to where that man had been (by the cart to the left of the tailor shop) and pick up the silver coin from the ground and search the black barrel at the left to get a dead fish.
Enter the toy shop and talk to the man. Look at the sled on the right wall. Try to take the sled and talk to the toymaker again and leave the shop.
Go to the tailor shop and talk to the tailor. Leave the shop and town and go left two screens to the bakery. Walk inside and watch the scene. After the lady and her son leave, talk to the baker and trade him the silver coin for one of the custard pies. Leave the shop and continue right. This building is the inn, ignore it for now. Search the haystack (failure for now…we need a little help with this.)
Continue left and see a big black bear tormenting bees at a tree. Use the dead fish on the bear and he’ll no longer be a bother. After the scene with Queen Beetrice, queen of the bees, take a honeycomb from the big hole in the tree and pick the stick up from the ground and walk up.
You see a dog pawing at an ant castle. Use the stick on him to chase him away and meet King Antony, king of the Ants.
Walk right and talk to the little gnome by the house.
Walk up to the big weeping willow tree and talk to the tree.
Graham automatically walks right. From the forest entrance (DO NOT enter the forest yet), go down and see a man sitting on a log weeping. Talk to him.
Walk down and you’ll be coming out from behind the bakery. Go left and search the haystack again (you’ll get help from King Antony and the ants, this time succeeding in finding the golden needle). Return to the tailor shop and trade the golden needle to the tailor for the blue cloak hanging up.
Go left four screens and up two screens and see a gypsy wagon. Walk left to the desert entrance SAVE HERE!
Walk left six screens (you’ll see a temple behind an oasis). Drink then hide behind the left boulder (it’s just a little taller than Graham). Save game! Wait for the bandits come and go. Drink again and save.
Go left two screens and down three more screens to an oasis; drink and save.
Walk down three screens and left one screen to the camp. Drink from the big brass jug to the right of the campfire. Save here! Ignore the big tent on the left, but enter the smaller one on the right. Going counter-clockwise along the edge, walk to the staff and take the staff. Leave the way you came, drink and SAVE!
Walk right four screens and up to an oasis, drink and save.
Walk up two more screens and see a skeleton and a discarded boot. Take the boot. Walk right two screens and up to an oasis, drink and save.
Walk up two screens to the mountain wall and go left one screen. Drink and go forward to the temple. Use the staff on the temple and quickly grab the brass genie bottle and the coin to the left of it and QUICKLY leave. Drink and save and walk all the way right back to Cedric. Go to the wagon and give the coin to the man, enter the wagon and watch the scene. Leave the wagon and go to the forest entrance. SAVE! Use the amulet on Graham then enter the forest.
The location of the witch can be random, so walk along the path until she pops up. Use the brass bottle from the temple on her.
Follow the path to a bridge that looks like it was made out of a ribcage. Cross the bridge and enter the witch’s house. Use the hand icon on the shelf on the left wall and take the pouch (the the inventory open the pouch by using the hand icon on the pouch). Use the hand icon on the skull hanging to key a key. Touch the hole in the front wall (window) and take spinning wheel.
Leave the house and cross the bridge. Go right two screens and follow the path to the tree. Use the key to unlock the door in the tree and take the heart.
Go left two screens and up one screen to be by some trees with three pairs of tiny eyes in the shadows. Use the emeralds on the path twice to fail at capturing one of the creatures. Squeeze the honeycomb over the ground and drop the last emerald in the honey. Follow him down underground. Take the shoes and go through the tunnel in the lower right corner of the screen (below the ladder).
Walk down and left to the gnomes with the marionette and trade him the spinning wheel for the marionette. Walk up to the weeping tree. Give her the gold heart and after she leaves, pick up the harp.
Walk down, right and down again to the bakery SAVE! This is why you needed to pick up that stray boot in the desert. This scene can be fast for some, so you might need to lower your speed. When the cat chases the rat through here, use the boot on the cat.
Return to town and go to the cobbler shop, trade the small shoes from the forest for the hammer and leave the shop. Go to the toy shop and trade the toymaker the marionette for the sled and leave the shop.
Walk up and you’ll be at a four-way crossroads, with a rattlesnake blocking the path to the right (ignore the snake for now). Go left three screens and up to where Madame Mushka’s wagon had been and take her tambourine..
Go down two screens and right to the inn and go inside. Talk to the men and you’ll get tied up and thrown into the cellar. Soon the rat comes out of the mousehole and gnaws at your rope and frees you. Use the hammer on the door to walk into the kitchen. Go to the cupboard by the right (cellar) door and take the leg of lamb and exit out the left door.
Return to the crossroads with the snake and use Madame Mushka’s tambourine on the snake to scare him away. Walk right.
On the snowy path, use the cloak on Graham and follow the path to the right.
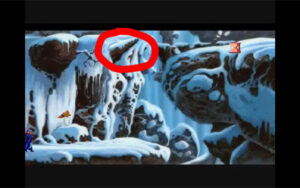
SAVE HERE! Use the rope on the portion of the mountain to the right of the branch that sticks out.
The game will comment on Graham being hungry, so use the leg of lamb on him and climb up.
The next part is tricky, so SAVE HERE.
Use the hand on the left most rock, then the back two then the right most one (totally skip the two in the front middle), then click the snow to the left of the log and finally the log to cross it over to Cedric.
Oh no! A wolf comes by and own-naps Cedric! Use the sled on the snowy slope to follow the wolf. Walk right.
Give the rest of your leg of lamb (Graham only ate half) to the eagle perched on the right. Continue up and enter the cave. After Queen Icebella talks, quickly play the harp. Follow the path to the cave, but before you can enter, a yeti charges at you. Quickly throw the custard pie into his face. Enter the cave and use the hammer to take a shard of crystal from the center. Return left to the wolf and he’ll lead you back to Cedric and Queen Icebella.
Walk right and down/right to the scoopy-shaped portion of the mountain close to Cedric. Graham is captured by a big bird. Pick up the locket from the nest and soon the eagle swoops in and rescues Graham (bye-bye cloak).
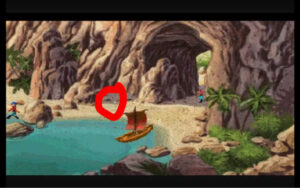
The eagle drops you off on a beach. Walk down the path and take the shaft of metal.
Walk up to the sailboat. Look at the boat and use the beeswax on it. Push the boat to cast off into the sea.
Sail down, right, up and left to be back at the beach. Go down to the boathouse and ring the bell that’s hanging next to the door. The hermit can’t hear you, so he goes back inside (ignoring Graham). Return down to the sailboat and sail down and right three screens to Harpy Island.
Watch the scene with the Harpies, and when you can, play the harp. Leave left to go back to the beach (Oh no! Cedric…) Take the conch shell from the sand.
Sail left five screens to be back at the boat house. Ring the bell again and give the conch shell to the hermit.
Once on Mordack’s Island SAVE! Take the dead fish at the left and follow the path. Use the crystal on the eyes of the left serpent statue (at the eyes) and follow the path up and left to a trap door.
Use the metal shaft on the metal door and enter. SAVE HERE. The labyrinth can be tricky. The darker paths I will call path and the outer sides I will just call by their side (left or right). For instance: if it’s a darker on the left, I’ll call it left path but if you click in the black border (or go straight to the side) on the right I’ll just list it as right.
Labyrinth
Left – right – left – down – right path – left path – forward – forward – left path – left – left path – right path – right path – right – left – right – left – left path – left – right path – right. Here you’ll see a locked door (if you try to open it, it won’t open).
Down – left – forward – forward – left and see a strange creature. Use the tambourine on it and take the hairpin it drops.
Down – right – forward – forward and right back to the door. Use the hairpin to pick the lock. SAVE!
In this room, open the cupboard on the left wall and take the bag of peas. Walk forward and talk to the girl Give her the locket you picked up in the giant birdsnest. After the scene walk right and save. Be careful with the big blue creature and the black cat. Grab the peas and when the big blue creature is coming at you, use the peas on it. SAVE!
Walk down and if the cat isn’t here, go right. He will be in either of these two screens, so go back and forth between them until you see him. Use the dead fish on him, then the bag left over from the peas. Note: The black cat is actually Mordack’s brother, Manannan, the evil wizard from King’s Quest 3: To Heir Is Human.
In the dining room, wait for the blue creature to return and capture you. In the cellar, use the fishing hook in the mousehole to get a chunk of moldy cheese. Wait and soon one of the bricks in the left wall will loosen and Cassima will appear. Follow her through the labyrinth. Left path – left – right – right path – right – right path – right – left – right – left – left path – left – right path – right to the door. Enter and go forward, right two screens, down, left and go up the stairs to Mordack’s bedroom.
Walk down to the library. Click the hand on the book on the table at the bottom edge of the screen. Walk up to the bookcase and stand close to the books (so the eye in the middle of the arch doesn’t spy you). Eventually Mordack will come into his room for a nap (this take about 2 1/2 minutes).
Quietly, enter his room and steal his magic wand. Go right two screens to the laboratory. Go up the stairs and right to the big machine. SAVE HERE!
Place Mordack’s wand on the left side and Crispin’s on the right side. Throw the cheese in the big vat below the machine’s big glass ball. Soon the magic will transfer from Mordack’s wand to Crispin’s. Take Crispin’s now re-energized wand.
This is where the images in Mordack’s magic book come into play. Use Crispin’s wand on Graham to access magic and select (one at a time) in this order: Tiger – Rabbit – Ferret – Rain (if you number the icons 1-4 with the top row being 1 & 2 and the bottom row being 3 & 4 it’s 4 – 2 – 1 – 3)
After Graham’s rain spell, the rest is an automatic ending sequence, so all you have to do is watch the ending! (this ending is about 7 1/2 minutes)